Constructing an Archery Stand
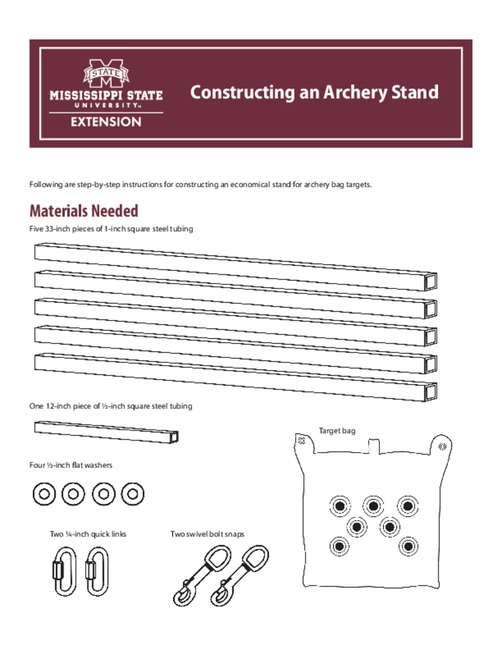
Following are step-by-step instructions for constructing an economical stand for archery bag targets.
Materials Needed


Parts
Step 1: Make sure that each main piece of 1-inch square steel tubing is 33 inches long.
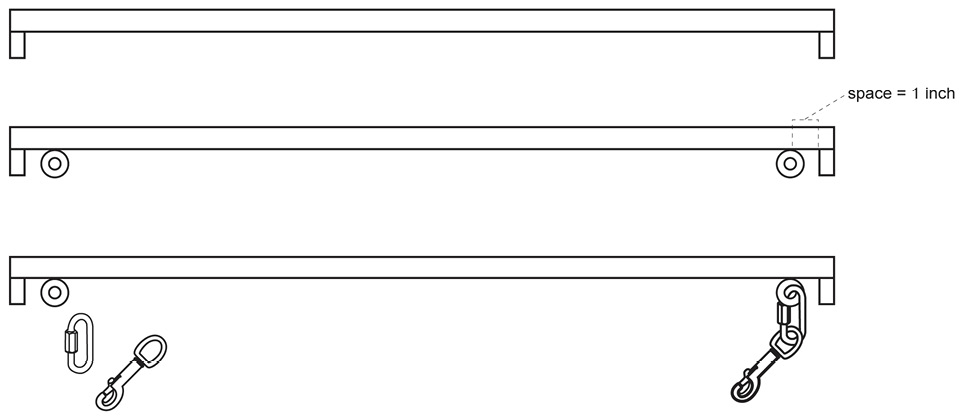
Step 2: Construct the top piece.
- Cut two 1-inch-long pieces from the 1/2-inch steel tubing.
- Weld the small pieces to one of the 33-inch-long pieces of tubing. Weld the pieces flush on each end.
- Weld a flat washer on each end, 1 inch from the 1/2-inch tubing.
- Attach quick links and bolt snaps through the flat washers on the top piece.

Step 3: Construct the side pieces.
- Use two of the 33-inch square tubing pieces and the other two flat washers.
- Weld a flat washer on one end of a square tubing piece. Do this to both pieces.

Step 4: Construct the bottom pieces.
- Cut two 1-inch pieces of 1/2-inch square tubing.
- Using the last two 33-inch square tubing pieces, weld a small piece in the center of the long piece. Do this twice.

Assembly
Step 1: Take the side pieces and attach to each of the two bases. Make sure the washer on each side piece is placed toward the base and to the inside of the frame. The purpose of these washers is to serve as an attachment point for smaller target bags.

Step 2: Attach the top portion of the frame to each of the two sides.

Step 3: Attach the bag to the frame. After disassembly, the top piece can remain attached to the target and used to transport the target.

Publication 2603 (POD-10-23)
Reviewed by Reid Nevins, 4-H Environmental Science and Education Specialist, Center for 4-H Youth Development. Written by John Long, PhD, former Assistant Extension Professor, 4-H Youth Development.
